Welcome to Living the Local Life! If you're new to my blog, you may want to subscribe to my RSS feed. Please feel free to leave a comment on any articles you view and thanks for stopping by!
Showing posts with label tomato. Show all posts

Thursday, September 30, 2010

Tomato Pie

If you need one last summery recipe before you switch to fall crops, this is your recipe!  Tomato Pie.  I had never heard of it until I read Simply Recipes blog, supposedly it's a Southern thing and the reason why I hadn't heard of it!  I had some fresh tomatoes that needed to be used up and this recipe sure did the trick.  I didn't attempt to make my own crust, but I can report that Dover Natural Foods has a great 2-pack of frozen all natural pie crusts for sale!  This recipe also calls for mayonnaise so if you're looking for a soy-free mayo, I highly suggest Hain Safflower Mayonnaise.  Don't knock this recipe till you try it!


Tomato Pie
adapted from Simply Recipes


Ingredients
  • 1 9-inch pie shell
  • 1/2 yellow, chopped
  • 3-4 tomatoes, cut in half horizontally, squeezed to remove excess juice, roughly chopped, to yield approximately 3 cups chopped tomatoes (squeeze well!  Even using my ricer I still had a little too much liquid in the pie.)
  • Sprinkle of basil, to taste
  • 2 cups grated cheese (combination of sharp cheddar and Monterey Jack, or Gruyere or Mozzarella)
  • 3/4 cup mayonnaise
  • Salt and freshly ground black pepper
Method
  1. Preheat oven to 350°F. Place pie shell in oven and cook for 8-10 minutes or longer until lightly golden. If you are starting with a frozen crust, you'll need to cook it a little longer. If you are using a homemade crust, freeze the crust first, then line the crust with aluminum foil and pre-bake it for 20 minutes, then remove the foil and bake an additional 10 minutes.
  2. Squeeze as much moisture as you can out of the chopped tomatoes, using either paper towels, a clean dish towel, or a potato ricer.
  3. Sprinkle the bottom of the pre-cooked pie shell with chopped onion. Spread the chopped tomatoes over the onions. Sprinkle the basil over the tomatoes.
  4. In a medium bowl, mix together the grated cheese, mayonnaise, a sprinkling of salt and freshly ground black pepper. The mixture should be the consistency of a gooey snow ball. Spread the cheese mixture over the tomatoes.
  5. Place in oven and bake until browned and bubbly, anywhere from 25 to 45 minutes.  Serves 6. 
Hope you enjoy this summery delight as much as we did!

Read more...

Monday, July 19, 2010

Homestead Happenings

I have been quite busy around the homestead, hence my sporadic postings!  I wanted to share with you what I've been up to.

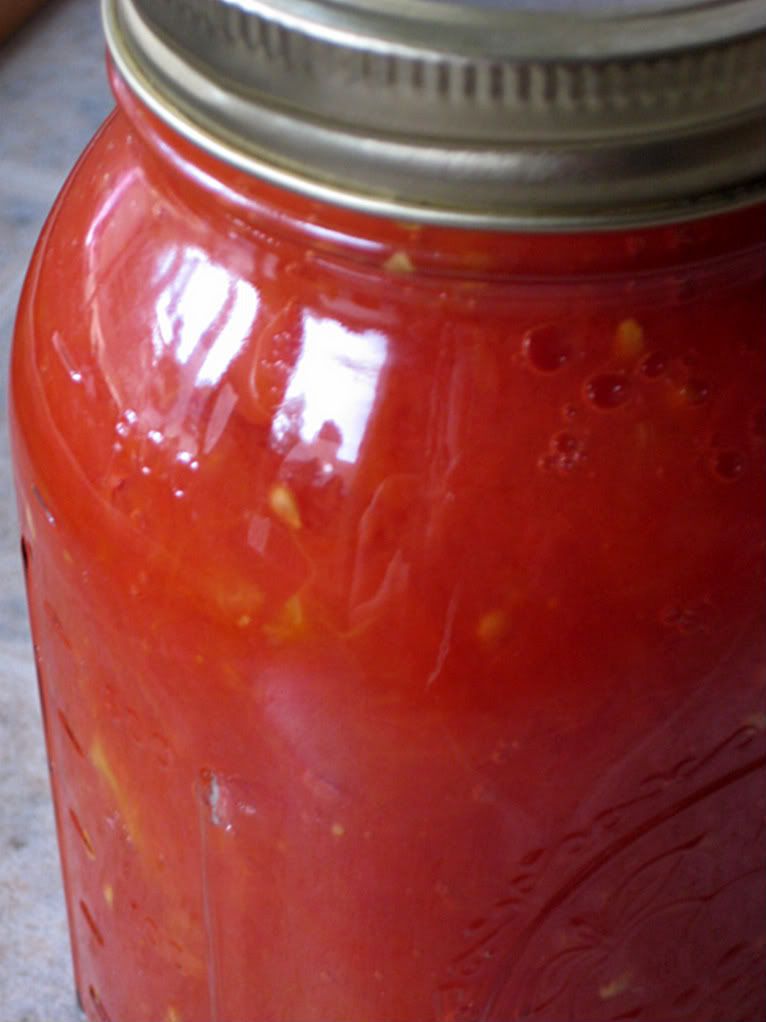
First off, it's canning season!  I canned my first vegetables, organic tomatoes (well, they're really fruit, but, well, not going there today!)  I also purchased a Presto 23-Quart Pressure Canner so I can put up some green beans and other not-so-acidic vegetables.  I also have high hopes for this zucchini relish recipe.  Yum!

Next, we've been working on getting the rabbit hutch turned into a chicken coop.  We're building an eight foot run off the hutch so the chickens can get some sun and grub.  I can't wait till the construction is all wrapped up and we're gathering eggs from our own backyard!
Sally and her baby bunnies are doing well.  The babies, now seven weeks old, are ready to wean and go into their own pen.  We'll be breeding Sally again this week.  So things are coasting right along with the rabbits.

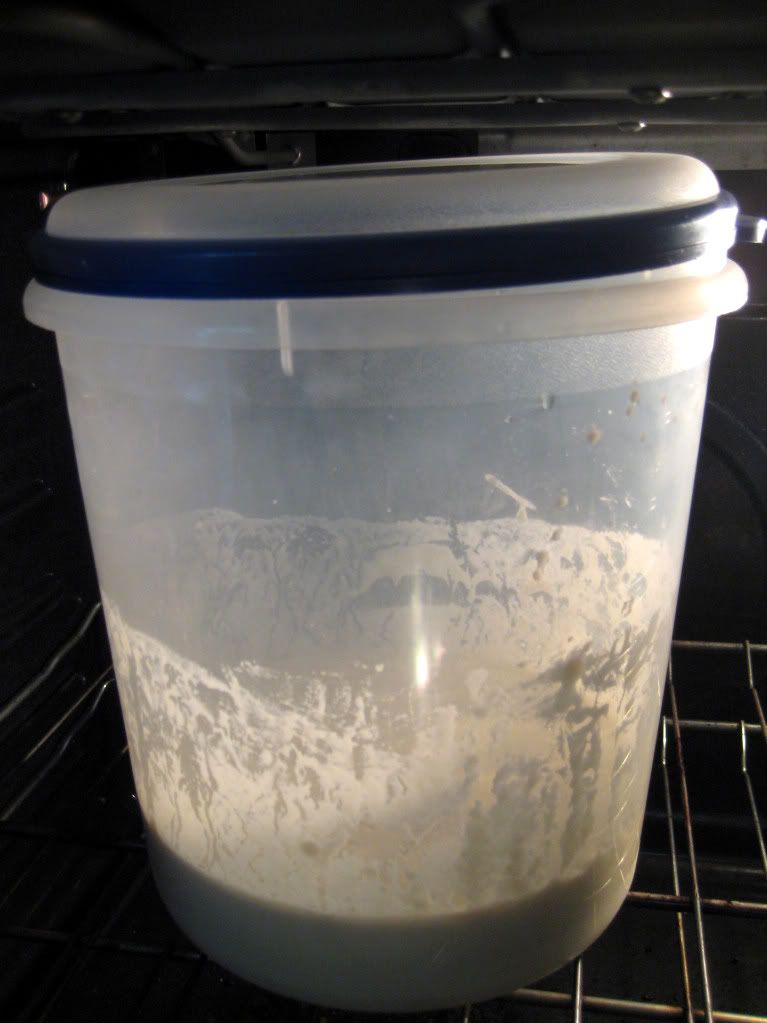
Today I started up my first sourdough.  I have a San Francisco starter from Goldrush Sourdough that I decided to get going.  I hope to cook lots of great things while going through Wardeh's Sourdough eCourse!  It's staying warm in the oven today (oven is off, but the heat of the light provides a constant warmth). 

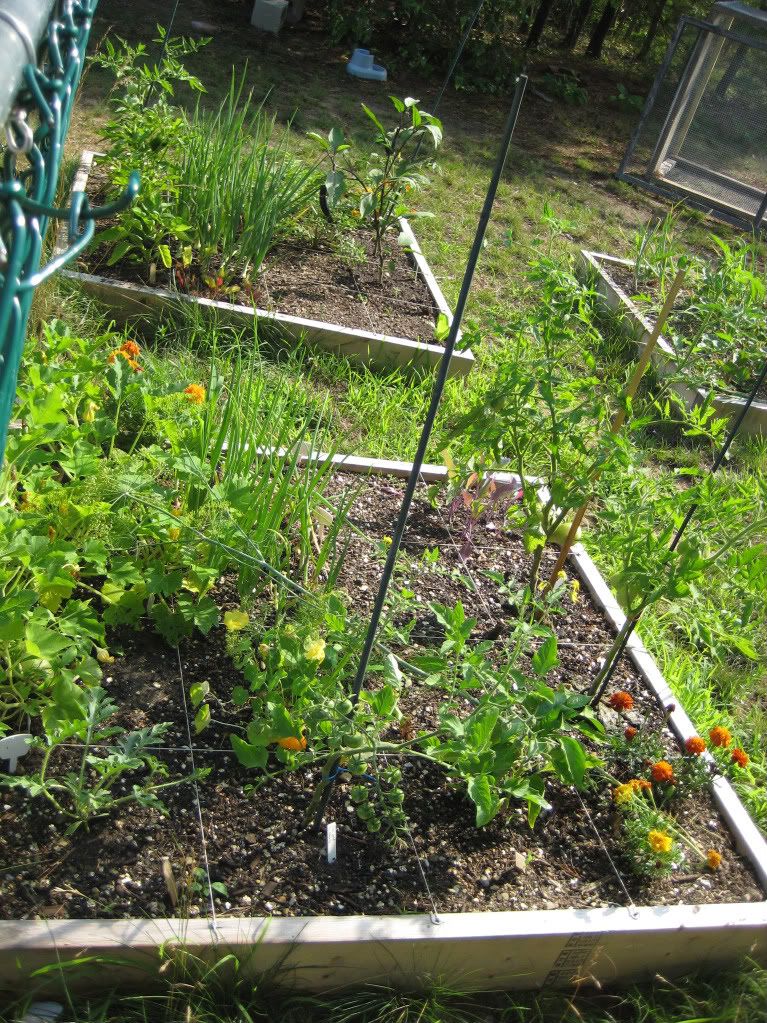
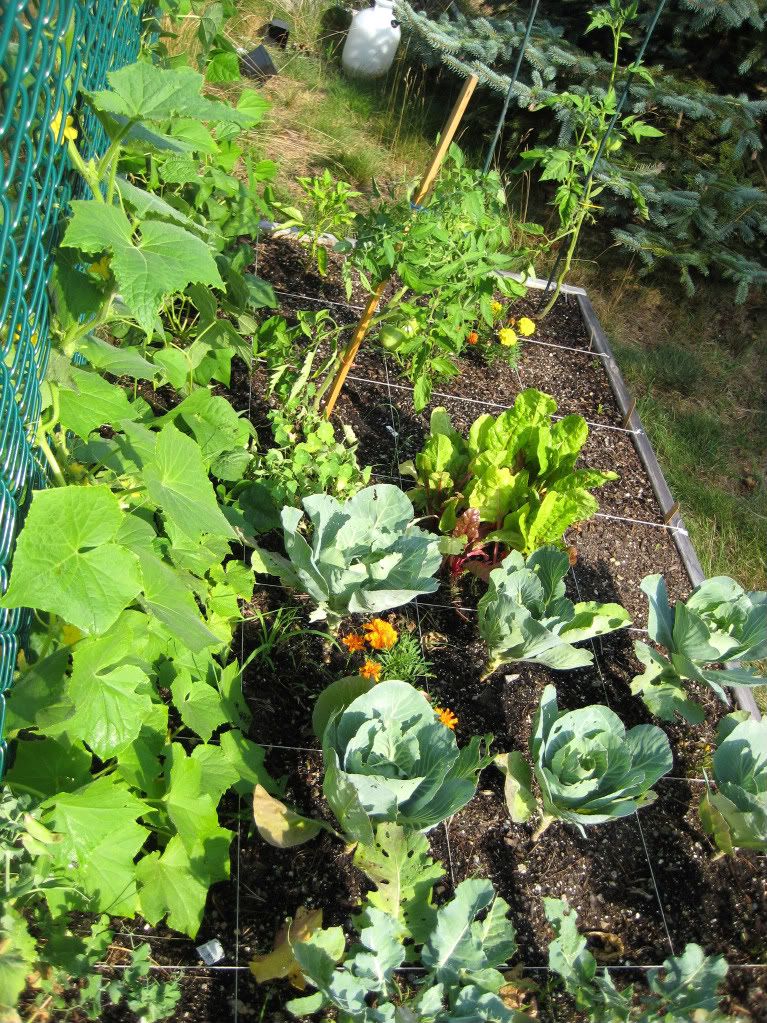
The garden is thriving in the sun with the perfect mix of rain.  I fed them some comfrey tea I "brewed" so I hope the burst of organic nutrients yields to a larger harvest!  I've already harvested: Swiss chard, onions, strawberries, cucumbers, turnips, eggplant, cherry tomatoes, parsley, snow peas, lettuce, broccoli, and zucchini!
How's your summer going?  What are you up to around your homestead?

Read more...

Friday, July 17, 2009

One Local Summer: Week 7

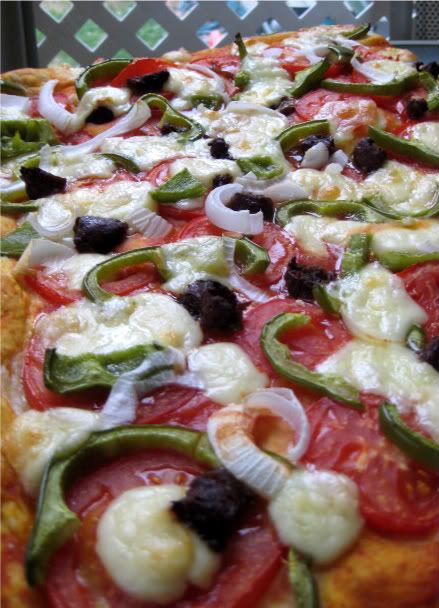
Pizza! Pizza is a very simple way of using up veggies from the garden. Pizza's are great with fresh tomatoes, peppers, onions, garlic and all those fresh Italian herbs.

For my pizza I used:

I cooked this pizza while I had my two kiddos running underfoot so I didn't get a chance to snag some herbs from the garden. You could most definitely top your pizza with basil or oregano if you so choose.

For the crust, I made it from scratch in the bread machine. I found a knock-off Pizza Hut style crust recipe from Recipezaar. Now, I don't dine at Pizza Hut frequently enough to know how this compares to their crust, but irregardless, it makes a very fine pizza crust! For another crust option, try Beer Pizza Dough in the bread machine.

Pizza Hut Style Pizza Crust
in the bread machine

1 1/3 cups water
2 teaspoons sugar
1 1/4 teaspoons salt
2 tablespoons olive oil
3 cups unbleached all purpose flour
1 teaspoon baking powder
1/4 teaspoon garlic powder
1/4 teaspoon onion powder
1 1/2 teaspoons bread machine yeast

2 tablespoons cornmeal
  1. Add ingredients (except for cornmeal) to machine bread pan in order as per manufacturer's instructions.
  2. Set to "Dough" cycle.
  3. Lightly grease one 9 x 13-inch pan and sprinkle with cornmeal.
  4. When the dough cycle is complete, roll out dough and place in pan.
  5. Let rest in pans for 10-15 minutes.
  6. Add toppings of your choice.
  7. Bake at 350°F until done (approximately 20 minutes, depending on the thickness of toppings).
You can now add your toppings however you like! I sliced my tomatoes and put them down as a base and then added the pepper and onion and pre-cooked sausage on top. (The kids ate most of the sausage, not much made it to the pizza!) I broke the curd up a bit and added that last. I know the crust isn't really local, but it's the best I could do! I kept all the toppings local though!! Try making a pizza with local ingredients this summer!

Read more...

Friday, June 12, 2009

One Local Summer: Week 2

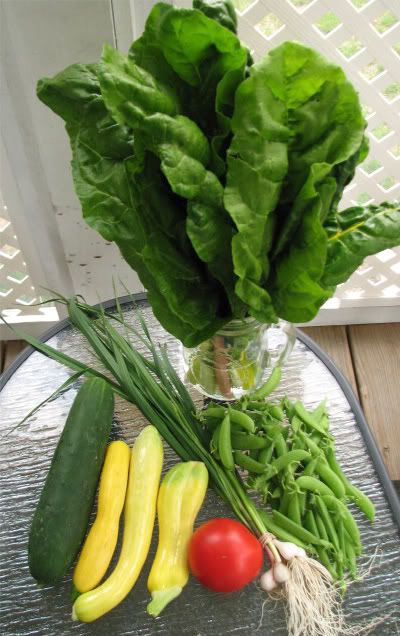
I was SO lucky to snag a tomato at the Dover Farmers' Market Wednesday. A sight for sore eyes (or eyes just wanting more than greens)! I also bought more summer squash, a cucumber, spring garlic, a head of swiss chard and I also snagged the last quart of sugar snap peas.

I searched very hard for this recipe as I knew I could somehow incorporate the tomato, chard and a half dozen local eggs for my second weeks' One Local Summer meal. Sure enough...may I now present:

Swiss Chard and Tomato Frittata
from Moosewood Restaurant Low-Fat Favorites, the Moosewood Collective

Serves 4

1 lb. Swiss chard
4 garlic cloves, minced or pressed (I used the spring garlic)
1 cup chopped onions (no local onions so I used one scallion from my garden)
2 tsp. olive oil
6 egg whites
2 whole eggs
3 T chopped fresh basil
1/4 tsp. salt
1/4 tsp. ground black pepper
1 medium tomato, sliced

1. Wash the Swiss chard, remove and discard the large stems, and finely chop the leaves.

2. In a 10 to 12 inch nonstick skillet, saute the garlic and onions (or scallion) in 1 teaspoon of the olive oil for 3 minutes on medium heat.

3. Add the Swiss chard, stir, cover, lower the heat, and cook for about 10 minutes. Remove the skillet from the heat and drain the Swiss chard if juicy.

4. In a large bowl, beat the egg whites, eggs, basil, salt, and pepper until blended and stir in the sauteed Swiss chard.

5. Coat the bottom of the skillet with the remaining tsp. of oil and return it to medium heat.

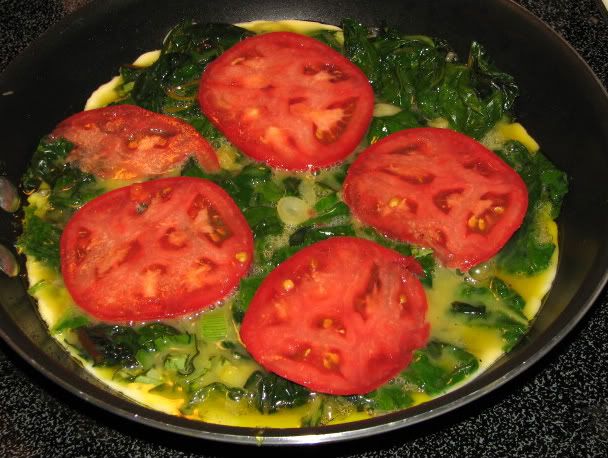
6. When the skillet is hot, pour in the Swiss chard-egg mixture and arrange the tomato slices on top. Cover and cook for 5 to 8 minutes, until the edges are firm and the bottom is golden and beginning to brown.

7. Place a large flat plate or pizza pan over the skillet and flip the skillet over so that the frittata falls onto the plate. Slide the frittata back into the skillet and cook for about 5 minutes, until the eggs are fully cooked. Serve immediately or at room temperature.

Okay, so here's what I learned, and this is a biggie for eating local: you can most certainly improvise the recipe and quite a few times you have to. For instance: I had a total of six eggs in my cooler (yes, fridge is still dead) so I used 2 whole eggs and 4 egg whites. The recipe still turned out fabulous! You just need to adapt and tweak the ingredients. Don't be afraid of trial and error!

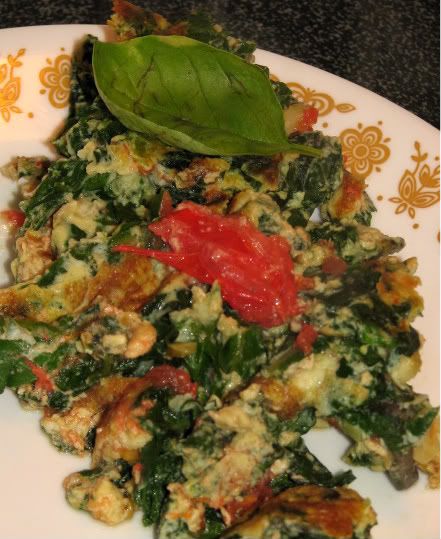
The second thing I learned is...you don't have to be a "pretty" chef. I tried REALLY hard to flip the frittata over so it'd be "perfect," but the frittata had other plans. It folded over once it hit the pan so I decided to just cut up the mix a bit and make it more scrambled egg-like. It wasn't as pretty in the end, but it seriously tastes the same and gets the job done!

So go out there and have fun, improvise as needed, and don't worry about perfection!

(I wanted to mention that this meal makes a great brunch or even breakfast (your breakfast choice sets your blood sugar for the day, why not treat it to a chard and eggs? It reheats great as well.)

Read more...

Sunday, June 7, 2009

Rooting for Tomatoes!

Here's one quick trick on how to get the most from your tomato plants...

Photobucket
My sister-in-law shared this tomato planting trick. For the square foot method, plant the tomato root at the corner of one square and bury the stem (leaves removed) so the plant comes up in the center of the square. It will be laying on it's side for a few hours but will quickly grow up towards the sun. The buried stem will now grow additional roots creating a strong root system for the tomato. The same can be done in containers or in the garden, just bury the stem of the tomato plant and grow even more roots!

Organic Gardening magazine has some more fabulous tomato growing tips. Here are a few I'll highlight and the rest can be found here in the online article.

Pluck the first flowers.
Growing deep, extensive roots and a full leaf canopy will help establish newly transplanted tomatoes. Many experienced tomato growers pull off the first flowers, so the plant does not devote energy to forming fruit before its roots and foliage have filled out. Amy Goldman, who grows hundreds of heirloom tomatoes in her Rhinebeck, New York, garden each season, reports, "I pull off all the flowers until the plants reach at least 1 foot tall." She also pulls off all the suckers (shoots that emerge from the main stem below the first fruiting branch).


Feed the soil first.
Avoid the common mistake of overfeeding your tomatoes. They thrive in soil that's rich in humus for extensive, well-nourished root systems and potassium (K) for strong stems. Add too much nitrogen (N) and you'll have a big, lush plant with very little fruit.

Mulch for sure.
While plastic mulch has proved its worth, all-natural mulches also help tomatoes grow well. Surround your plants with a layer of straw, leaves, dried grass clippings or pine needles and it will keep the plants' roots cool, prevent weeds from sprouting around them and retain moisture in the soil. Because these mulches keep the soil cool, don't apply them until after the soil warms to 65 degrees F.

Warren Farm in Barrington, NH has also confirmed their PYO red or green tomatoes will remain $1/pound this year. Get your canning gear out! Sign up here for their mailing list to be kept up on when their vegetable and fruit harvests are ready. (Hint: strawberries are out in their farm stand already!)

Read more...

Wednesday, May 27, 2009

Non-traditional Growing Methods

*Garden pictures are coming...if it ever stops raining!*

(Picture above is from The House We Call Home.)

I wanted to share two different gardening techniques that I'm going to try out this summer. I haven't actually assembled them yet, but I wanted to at least share the information with you!

The first is growing potatoes in a bin or bag versus directly in the ground. My plan is to take my empty peat moss bags (with holes poked in the bottom for drainage) and grow potatoes in them. I have Kennebec, Yukon Gold and Pontiac Red potatoes to grow from Rochester Blue Seal. What I'll do is roll down the bag so I can fit 6 inches of dirt in the bag and bury my seed potatoes. As the plant grows up you'd bury the stem so that only 4 or so inches are above the soil, unrolling the bag as needed. When harvest time comes you'd just slice open the bag and voila out pours your potato harvest! A few other variations of this growing method (from this site):

Field growing: This is the conventional way most potatoes are grown. Generally, the seed potatoes are planted about 12 inches apart in rows that are spaced 2 to 3 feet apart. The seed pieces' are planted about 1 inch deep, then covered with additional soil as the sprouts develop.

Straw: For centuries, Scandinavians have grown potatoes in stacks of straw or other mulching material. Potatoes are planted above ground in the straw, and as the vines begin to grow, additional straw or mulch is mounded up around the base of the plants. This results in a yield of very clean potatoes. New potatoes can be harvested easily even before the potato vines mature completely.

Under plastic or in plastic garbage bags: Garden soil or a commercial potting soil can be used to grow the potatoes in the bags, Fold over the top half of the bag, fill with soil, and plant a certified seed potato that has been cut in half. The plastic bag can be set above ground wherever it's convenient. Punch holes in the bottom of the bag for drainage.

You also can plant potatoes under black plastic. Cut open a piece of the black plastic, and plant a potato piece. The potato tubers will develop as they would in the open ground. However, the tubers that develop close to the surface of the soil are shaded by the black plastic and should not develop the green inedible portions that often are found on other tubers. The black plastic also will aid in controlling weeds.

Garbage cans or containers: Old garbage cans, or wooden or fiberboard-type containers are suitable for growing potatoes, if they have adequate drainage. You can conserve space by growing them in this manner. A word of caution, though: The plants tend to dry out more rapidly when grown in containers, so additional watering will be needed. Otherwise, you're likely to end up with misshapen tubers.

The second alternative growing method I want to try is growing tomatoes upside down. Alot of stores are carrying the popular "Topsy Turvy" hanging tomato grower, but I've opted for 5-gallon buckets from Home Depot with a hole drilled in the bottom for the tomato to grown. I have the buckets and the tomatoes, I just haven't got the planting done yet. This year I'm going to just attempt to hang the cherry tomato varieties and plant the paste and slicing varieties. I've heard you can hang all varieties, including the big Brandywine's but I'll stick with the cherry's this year and see what grows. I'll be hanging a total of three buckets.

What different growing methods are you trying this summer? I'll keep you updated on how things grow!

Read more...

Saturday, May 9, 2009

Willow Pond Plant Sale

If you're looking for veggies and herbs that will be ready for pickup right around southern NH's frost-free date, check out the upcoming Willow Pond Community Farm Plant Sale.

Please stop by the Pilgrim Church on Saturday, May 23rd from 9 am to 12 noon for Certified Organic vegetable seedlings, including 16 varieties of tomatoes. To pre-order seedlings, download and print the pre-order instructions, plant selection and order form and mail the order form in with your payment. Pre-order deadline is May 16th, more plants available day of sale. To insure you are able to purchase the heirloom or particular plant you would like, make sure you pre-order. The plants sell quickly.
I think this is something I'm definitely going to pre-order from Willow Pond Community Farm. It seems very convenient to pre-order and then your order is all ready for pick up at the Pilgrim Church on May 23rd.

Does anyone have a favorite tomato variety that I must try? Always looking for suggestions! (First time tomoto gardener!) As of right now I'm thinking about Matt's Wild Cherry , Sun Gold Cherry, Rutgers, Brandywine and maybe some different colored tomato. Give me your input, please! :)

Read more...

Wednesday, March 18, 2009

Chocolate Chili Cha-Cha

Sounds yummy, doesn't it? Well it was! I made this for a chili cook-off at my husband's work. Let's see if it wins anything. (Tweaked from this recipe.) I also apologize for the lack of a picture. The lack of natural light was no help. You know what chili looks like, this is no different!

Chocolate Chili Cha-Cha

1 (29 ounce) can tomato sauce
1 (28 ounce) can peeled and diced tomatoes
1 cup diced onion
1 teaspoon minced garlic
1-1/2 teaspoons Italian seasoning
1/2 pound bacon, diced
1 pound spicy sausage
1-1/2 pounds ground beef
1/2 (32 ounce) bottle hickory smoke barbecue sauce
1/4 cup chili powder
2 (15.25 ounce) cans kidney beans, undrained
1/4 - 1/2 teaspoon liquid smoke (optional)
1 (1 ounce) square unsweetened chocolate, chopped

1. In a large pot or Dutch oven over medium heat, combine tomato sauce, tomatoes and Italian seasoning.

2. In a large skillet over medium heat, cook bacon until slightly crisp. Drain and stir into the pot. Retain the oil for the next step.

3. Add the chopped onion and garlic to the bacon grease and saute till lightly browned. Drain and stir into the pot.

4. In the same skillet over medium heat, cook sausage until browned. Drain and stir into the pot.

5. In the same skillet over medium heat, cook the beef until brown. Drain and stir into the pot.

6. Stir the barbecue sauce, chili powder and liquid smoke into the pot; taste and adjust seasonings.

7. Stir in the kidney beans and chocolate and simmer until flavors are well blended. Serve.


Enjoy and wish me luck! I'll let you know if I win anything! Oh and don't hesitate to try this in the crockpot. Chili is always better after it's aged a bit.

Read more...

Wednesday, January 28, 2009

Old School Chili

Here's the Old School Chili recipe from the Meat Club Cookbook I'm currently giving away! Be sure to enter before January 31st! I used local garlic and Tina's ground beef for this recipe. Come garden season you can also use tomatoes, green pepper (didn't have any on hand this time around), and onions!

Old School Chili

3 TBSP olive oil
1 pound ground chuck
1 28-ounce can chopped tomatoes
2 medium onions, coarsely chopped
1 green bell pepper, diced
3 TBSP chili powder
1 tsp cayenne pepper (I used 1/2 tsp)
2 garlic cloves, minced
2 15-ounce cans red kidney beans
Salt
Freshly ground black pepper (I didn't add salt or pepper)

1. Heat the oil in a large saucepan over medium heat until hot. Add the beef and brown while stirring about 5 minutes.
2. Add the tomatoes, onions, bell pepper, chili powder, cayenne, and garlic. Cover and simmer for about 1 hour, stirring frequently to prevent sticking.
3. Add the beans and simmer another 20 minutes, until the beans are heated through. Taste and add salt and pepper as needed.

Steve and I both enjoyed this meal. Especially on this snowy Wednesday! And chili tastes better as it ages, so this could definitely be made ahead. It would go well with a foccacia or Cheesy Beer Bread.

Read more...

Friday, September 26, 2008

October Eat Local Challenge

I wanted to announce on my blog that the Eat Local Challenge will be taking place in the month of October. Eat local for a whole month, you say... Well, you get to make up your own rules with what you think you can realistically do. I do want to encourage you to sign up for the challenge and strive for at least one full local meal per week. And if you want to do the full month, go for it!

Honestly, with me having two busy little ones and not much time to shop locally, I think I will be aiming for at least one fully local meal per week. Ideally, with no children, I'd probably be able to do the full month, but I'll sign up for what I can do. I think I'll also commit to dining at local mom & pop restaurants, no restaurant chains, McDonald's etc... My end goal is to eat as locally as I can, so everyday I'll try to incorporate something local.

Try to think outside the box on this one and let me share with you some great resources.

Local Food Co-op (contact Lenore, she is extremely friendly and this seems like a great way for us busy people to have one set place to order and pick up local goods. Also, if anyone is interested in possibly having me, or someone else, pick up your order in Brentwood for a nominal fee (price of gas or less) with a pick up in Rochester, NH, e-mail me.)

Warren Farm - they have a full field of PYO tomatoes for $1/lb. This would make great crockpot pasta sauce, salsa, or to put on top of your pizza. This is a great local bargain.

Butternut Farm - everyone knows I'm a die hard Butternut Farm fan! $.89/lb for apples. Think about all that yummy apple crisp or applesauce you can make!

Seacoast Harvest - your local food guide

Seacoast Growers Association - a list of a few local farmer's markets. Most are open through the middle of October.

I'm going to be blogging soon about a new place to get raw milk in Milton, NH. At the Thirteen Colonies Farm (near the NH Farm Museum), one gallon of raw milk is only $4 with a $5 bottle deposit. Stand by for that post! There's also Brookford Farm for raw milk, yogurt, quark cheese, cream, eggs and meat.

(**I no longer advocate Thirteen Colonies Farm.  Please direct your raw milk business to Brookford Farm.  I am not saying that Thirteen Colonies milk is unsafe, I do not know that, but for me and a few others, their practices seem a bit off.  If you have further questions, feel free to e-mail me.)

So your mission, if you choose to accept, is to head over to the Eat Local Challenge website and sign up for the October challenge and get thinking on ways you can incorporate more local foods into your menus. And be sure to keep checking my blog for updates, recipes, events, ideas and more on how to live locally. You can do this by joining as a Follower of my blog or by signing up for e-mail updates.

Get ready for a challenge! We can do it!

Read more...

Monday, September 8, 2008

Crockpot Tomato Sauce

I've heard a few of you have an bumper crop of tomatoes. I have a ton of cherry tomatoes, but that has no relevance on today's post. I need to find a recipe for cherry tomatoes!

Anyway, I do plan on picking my tomatoes this year at Warren Farm in Barrington, NH. They have a pick-your-own tomato patch with tons of varieties and they only cost $1/lb!


INGREDIENTS
  • 4 onions, chopped
  • 4 cloves garlic, minced
  • 1 green bell pepper, chopped
  • 1/2 cup vegetable oil
  • 16 cups chopped tomatoes
  • 2 tablespoons dried oregano
  • 2 tablespoons dried basil
  • 1/4 cup chopped parsley
  • 1/4 cup white sugar
  • 2 tablespoons salt
  • 3/4 teaspoon ground black pepper
  • 1 (6 ounce) can tomato paste

DIRECTIONS
  1. In a slow cooker sauté together the onion, garlic, green pepper, and vegetable oil. Cook until onion is transparent.
  2. Add the chopped tomatoes, oregano, basil, parsley, sugar, salt, and ground black pepper. Cook for 2 to 3 hours on low heat. Stir frequently.
  3. Let sauce cool. Pour sauce into quart size freezer containers. Store in freezer.
  4. When ready to use sauce, stir in can of tomato paste.

So while I hate posting a recipe I myself haven't tried, do know that I plan on trying this and I'll get back to you on how it goes. Judging by the reviews of this recipe on AllRecipes, it sounds like a keeper!

Oh and for reference, 1 medium tomato yields 1 cup chopped so you'll need at least 16 tomatoes for this recipe.

Read more...

Total Pageviews

Blog Widget by LinkWithin

  © Blogger templates The Professional Template by Ourblogtemplates.com 2008

Back to TOP